Groups - Expert/Admin
The Groups section of your navigation bar allows you to structure your organization into groups and then manage each group. Group management includes creating groups, setting up the wizards and reports members use within that group, adding members to groups, creating and copying a link for people to join the group, managing sharing options for the group, and accessing all data related to the group itself and everyone in it.
What is a “group?”
You can create groups to organize your people and cater to each group’s varying needs and goals. You can set up different exploration processes, like wizards, post-assessment counseling, or extension activities, and materials, like reports, based on your desired experience for each group.
Search Tool
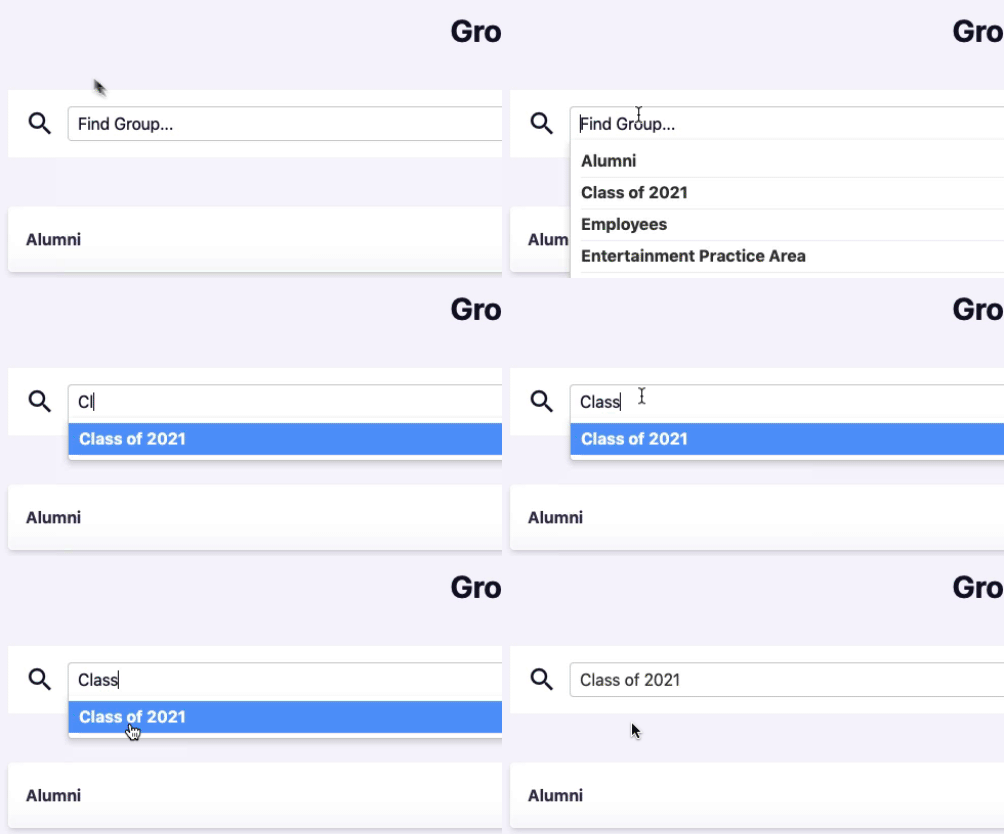
One of the first things you’ll notice at the top left of the page is a search tool.
If you click inside the box, the tool will show an alphabetized list of groups in your organization.
As you start typing the group name, the list will automatically narrow to only include group names that contain letters in the order you have typed them.

Once you see the name of the group you want to view, click it in the list and that group’s page will open. From there, you can view any information associated with that group.
Create New Group
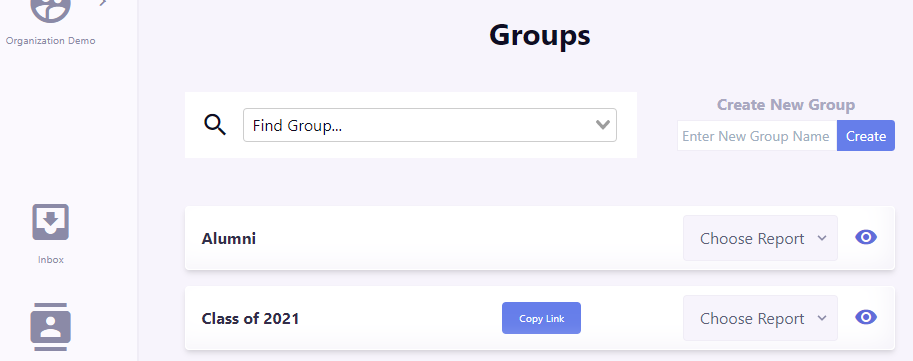
At the top of the Groups page, you can see a heading that says “Create New Group” on the right. Underneath the heading is a box that says, “Enter New Group Name.” This is where you can add new groups to your organization. Type what you would like to call you group and click the “Create” button.
This will take you to a new group page where you can set, view and edit the parameters of that group, including the group’s link, group members, sharing options, and the wizards, reports, and group reports assigned to the group. You can also view all of the data and reports associated with the members of a group. Read more about the Group Page here.
Group Cards
On the Groups section page, below the Search and “Create New Group” tools, there is an alphabetized listing of all groups in your organization. Within two clicks, you can see any profile or report associated with the group or it’s members.
Group Name
Each group card allows you to access information about that group. On the left of the group card, you see the group’s name.
Invite People to Join Your Group - Copy Link Button
Once you make a group, you may want to invite people to join it. The “Copy Link” button allows you to easily copy the link for the group, so that you can conveniently email it to people you want to join. When you click the “Copy Link” button in the middle of the group card, a box will pop up and show you the link that you just copied. It will say, “You just copied:...” followed by whatever group code you made on the group page. (doclink to group code in group)
It is REALLY great that the system confirms what you just copied so that you can double check that you indeed copied the correct link. You don’t want to send out the wrong link to hundreds of people!
Choose Report Drop Down Menu
On the right of the group card, is a “Choose Report” drop down menu. Clicking this drops down an alphabetized list of all the group reports for that group. Choose the report you would like to view and a full report will open in a new tab.
Blue Eye Icon - View The Group
To the far right of the group card is a blue eye icon. Clicking this will take you to the group’s detail page.


